Home
Band Saws
Wire Saws
Grinders
Wet Belt Sander
Miter Saw
Grinding Bits
Glass Cutter
Support
Contact Us
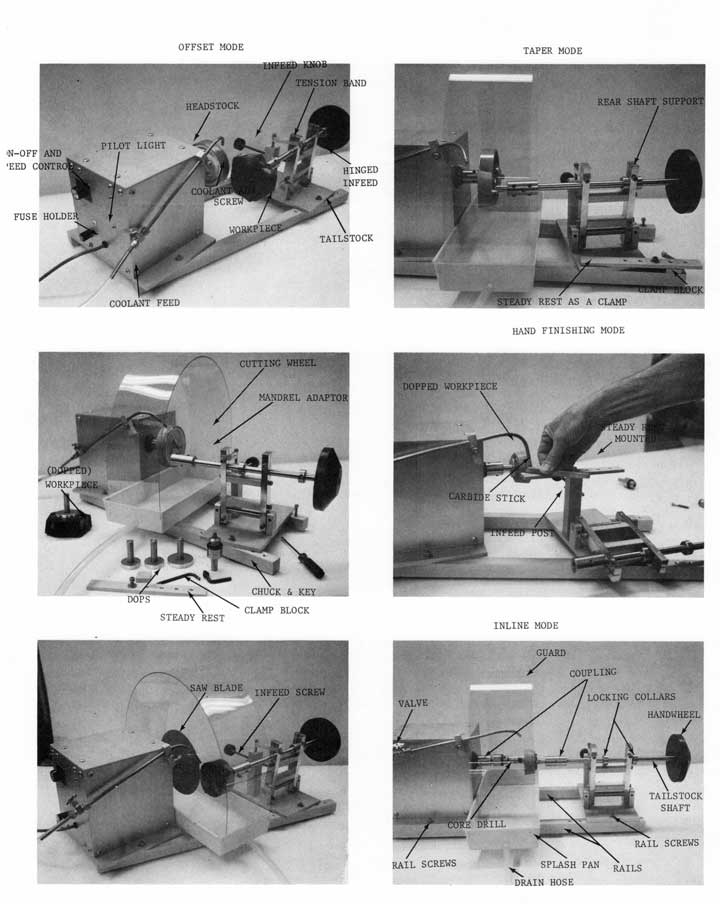
Diamond Gem Lathe Instructions